Now let’s look at how to create albums in the workplace. Create albums and upload photos to share precious memories with your coworkers.
Mobile: Creating Albums
You can create albums in the workplace, in a group, and even between buddies.
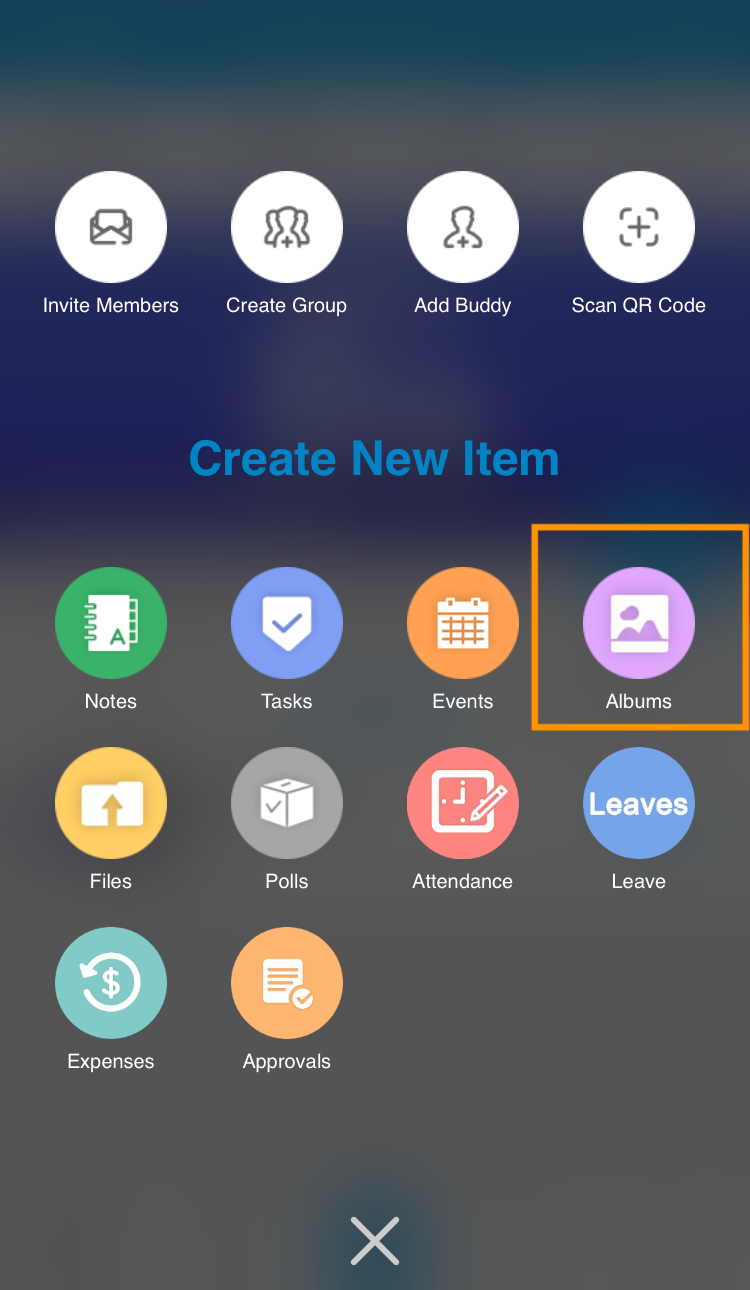

1. Tap the plus icon, then choose Albums.
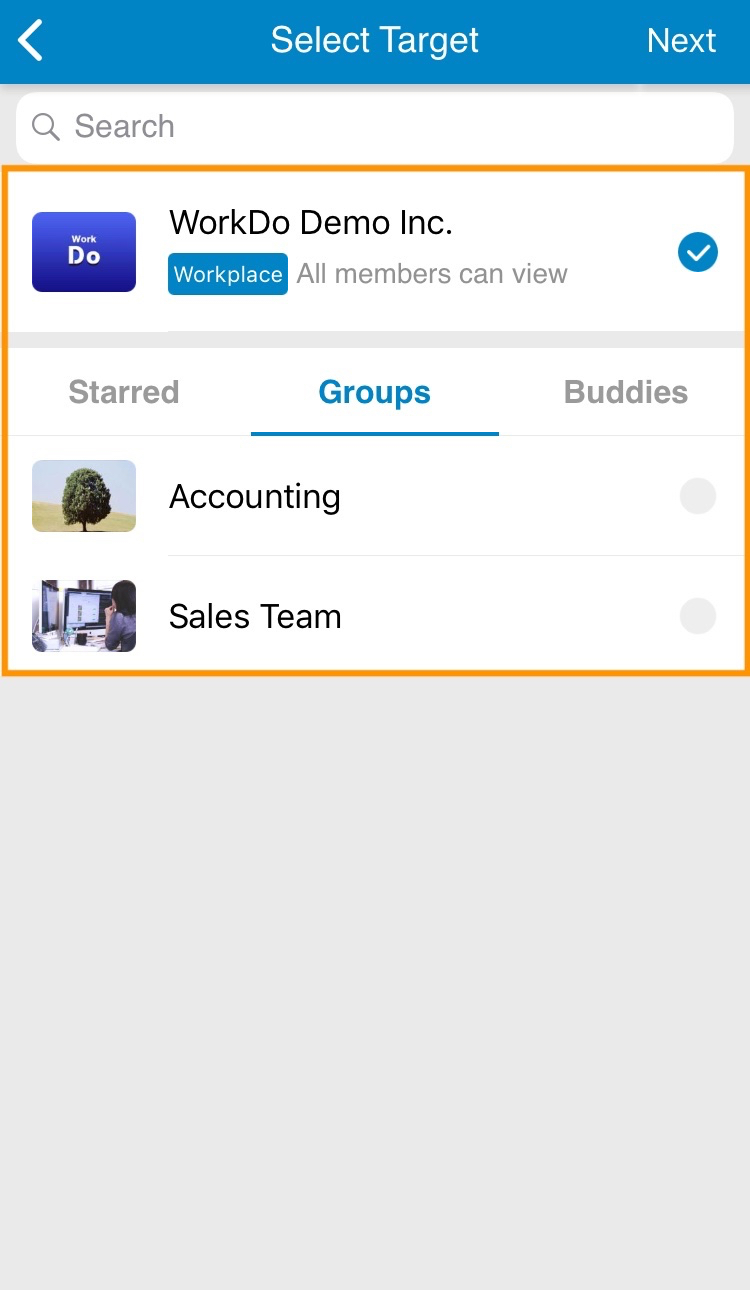
2. Choose where to post the album, then tap [Next].
3. Enter the album name. You can add a memo to give the album a description (this is optional), then tap [Post].
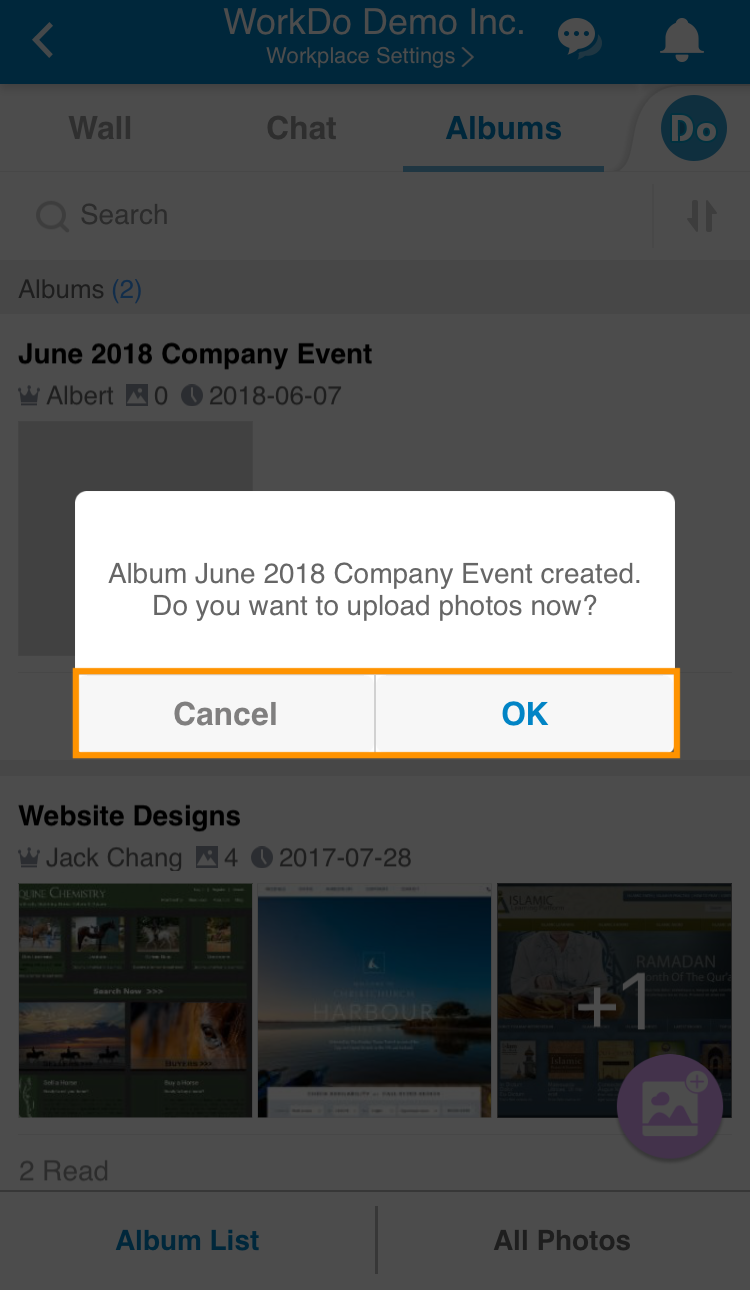
4. You may immediately upload photos after creating an album. Tap [OK] to select photos to upload from your device, or tap [Cancel] and upload photos later.
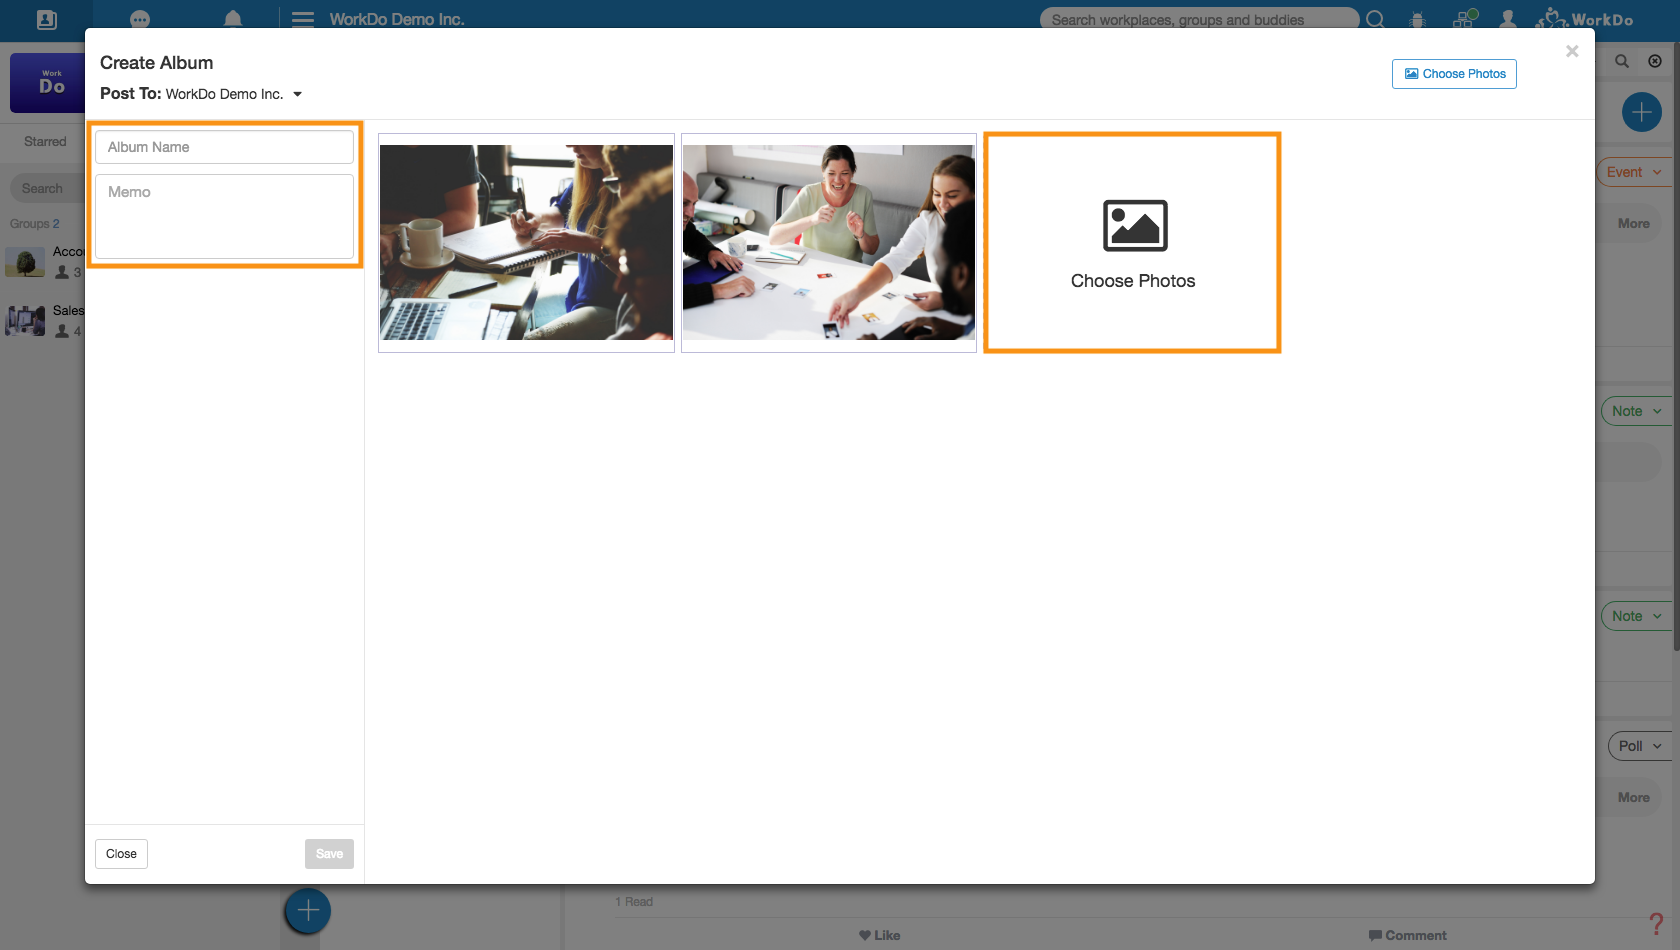
Web: Creating Albums
Similar to the mobile app. The difference is you can choose which photos to upload while you’re creating an album on the web interface.

Pro Tip: Batch Select Photos
You can batch select photos in an album to delete, move them from one album to another, or save them all to your device at once.
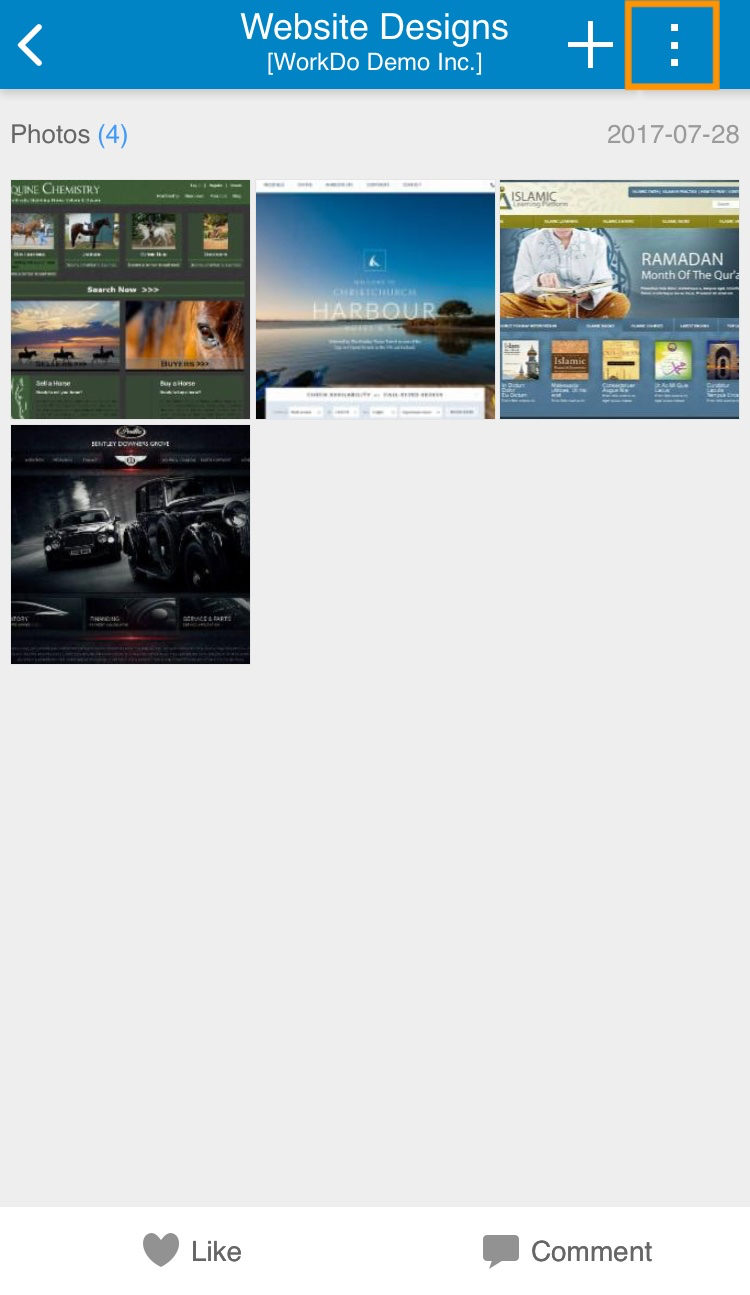
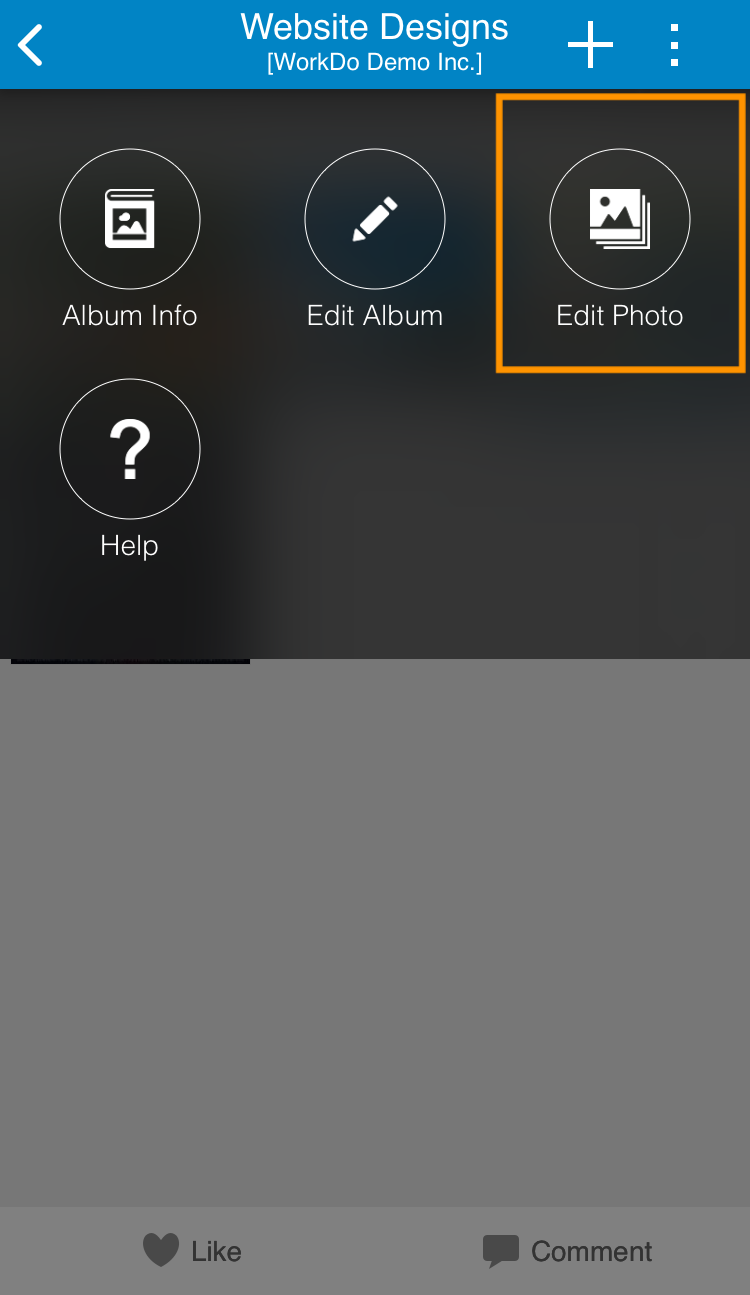
1. Tap the top right corner of an album, then choose [Edit Photo].
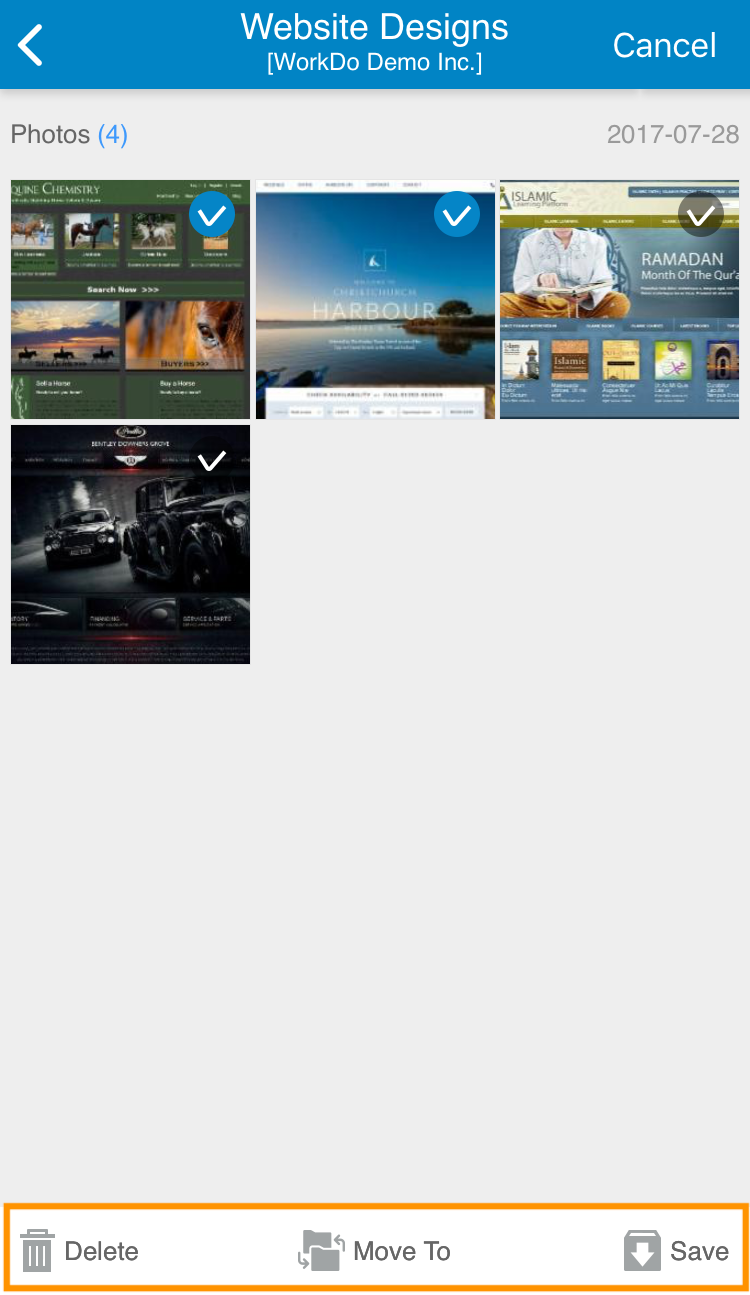
2. Select the photos, then tap [Delete], [Move To], or [Save].
[Delete] removes the selected photos from the current album.
[Move To] removes the selected photos from the current album and places them in the target album.
[Save] downloads the selected photos to your device.
The batch select feature is only available on the mobile app and is not supported on the web interface.
For more information, please check out Resource Center: A comprehensive guide to WorkDo
Google Play (Android): WorkDo 3.5.16 and above
App Store (iOS): WorkDo 3.5.14 and above
Try web interface!
Like us on Facebook!
We provide function tutorials and interesting articles every week!